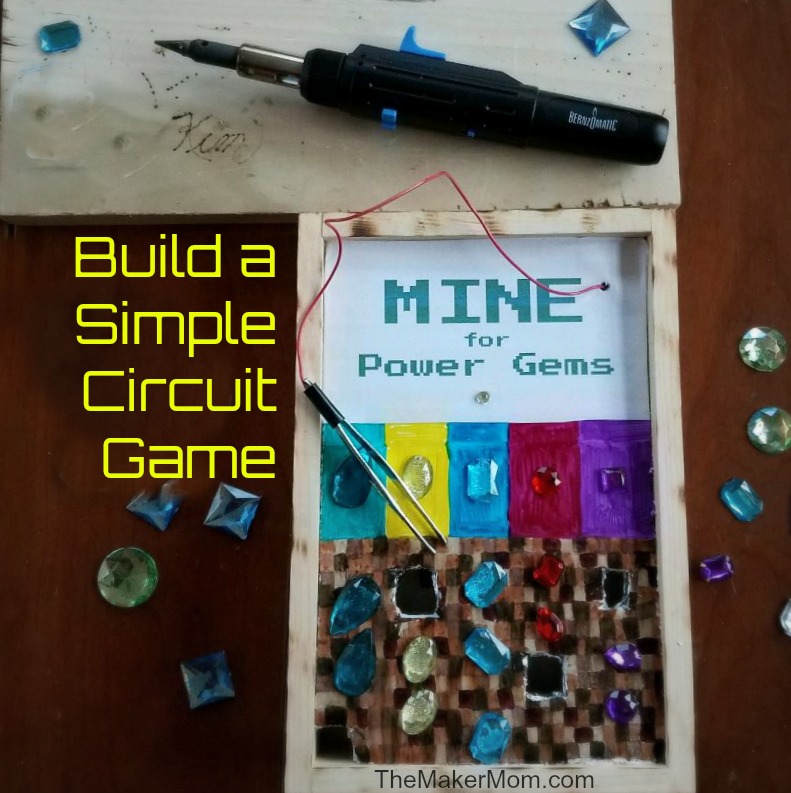
 I’ve partnered with Bernzomatic to bring you another fun STEM project to keep you and your big kids busy over Spring Break. This time we’re making a sort of a DIY Operation game called Mine for Power Gems. As with the Fridge Fun Marble Run, this engaging project allows your kids to get crafty while building STEM knowledge and skills.
Get ready to fire your Bernzomatic ST500 Cordless Soldering Iron up again! The cool thing about a cordless soldering iron is that it’s portable. So you can solder on the go. As long as you can create a safe, well-ventilated workspace wherever you go, that is.
The Bernzomatic ST500 is a lightweight, portable, butane-fueled multitool. With its three interchangeable tips, it can be used as a soldering iron as well as a wood and leather burner, a hot air blower for heat shrinking, and a micro torch. Used with adult guidance and supervision, it will open up new worlds of making for your child. You can pick one up the Bernzomatic tools, solder, and a Butane refill canister at hardware stores like Home Depot or Lowes.
Mine for Power Gems: a DIY Operation Game
Operation, the classic kids’ game, challenges players to remove goofy body parts (like a funny bone) from a “patient” with a set of metal tweezers. If the person playing doctor lacks calm, steady hands, their jittery movements will touch the metal part of the board and cause a buzzer to sound. The board is designed to be an incomplete circuit. If the “doctor” completes the circuit, energy flows through it, lighting up the patient’s nose and emitting a buzz.
Circuits 101
A circuit is a continuous circle (or other shape) of energy. Energy flows around a circuit, but if there’s a break in the flow, everything comes to a halt. When the circuit is closed again, the energy once again flows. Think about flipping on a flashlight or a light switch in your house. You close the circuit to energize the light.
In the Maker world, a basic circuit involves lighting up an LED with a coin cell battery. Once you learn to do this, you can incorporate it into several fun projects. The circuit in this DIY Operation game is just a little more challenging. Which is to say that building it involves soldering to establish solid connections within the circuit.
Soldering Safety
Things to keep in mind for soldering safety:
- NEVER touch the hot parts (basically anything metal) of the soldering iron while it’s heating up, in use, or for a time after use as it cools down.
- Have a safe place to rest your iron. Notice how the Bernzomatic ST500 has a built-in rest that prevents the iron from touching any surfaces?

- Do not hold wires with your hands as you solder them! Use the helping hands or mock up something to do the job.

- Wear eye protection.
- Bernzomatic makes lead-free as well leaded solder. Leaded solder tends to be easier for beginners. Regardless of which type you use, make sure you work in a well-ventilated room and wash up with soap and water afterward.
- If your helping hands unit has a magnifying lens, use it. You don’t want to lean in and breathe those fumes.
Keep in mind that soldering takes practice, regardless of your age. It’s a handy skill to have, though. If you can solder you can make basic repairs to items like speakers and other broken wires. Plus, it opens up a whole world of electronics projects.
Speaking of which, we’re almost ready to Mine for Power Gems.
LEDs and Polarity
Our circuit includes an LED. These tiny lights have polarity, which means that electricity must flow through them in a certain way for them to light the bulbs. The LED has a positive (+) leg and a negative (-) leg. The positive leg is longer than the negative one.
In this project, we’ll track the positive flow and the negative flow by using wire with a red insulated coating for positive and the black wire for negative. This red/black combo is very common, but the colors are traditional and hold no other meaning. The wires are exactly the same under the insulation. However, it’s easier to track the flow of electricity if you use two colors.
Now Let’s Craft Mine for Power Gems
Supplies:
- Bernzomatic ST500 Cordless Soldering Iron
- Bernzomatic Butane Refill (This will carry you through many projects.)
- Bernzomatic solder
- Safety glasses
- Helping hands device
- Wire, ideally in two colors
- Wire stripper/cutter (Scissors will do in a pinch.)
- Cutting mat (You can upcycle a corrugated cardboard box.)
- Heavy duty aluminum foil
- Electrical tape
- LED
- Battery pack for 2 AAA batteries
- 2 AAA batteries
- Conductive tweezers (if they are attracted to a magnet, they are good conductors)
- Scissors
- Faux gems or other items to fish out of your game board
- Game board and base (I used a wooden frame and foam board, but a cereal, gift or pizza box will do the trick, too.)
- Glue dots
Design and Decoration:
- Markers, crayons, or colored pencils
- Graph paper
- Glue stick
- Paper
- Stickers
The Goal
Similar to the game Operation, the goal of Mine for Power Gems is to carefully “mine” or remove gems without setting off the alarm. As with Operation, it takes a steady hand. You can adapt this idea to the theme of your child’s choice. In fact, the more ownership your child has over the design, the more they will care about the outcome.
 Mine for Power Gems is housed in a small wooden tray that I picked up at a craft store. You could replicate this with a cereal box or clean pizza box. I can’t wait to see what yours look like! Post your family’s creation on Facebook and tag The Maker Mom!
Design the Game Board
Sketch your design on the front side, noting where on the top portion you want the LED and where you want the wire for the tweezers to come out. Additionally, decide where you want holes for the gems, body parts, or other items to be removed.
After you’re happy with the design, go ahead and draw, paint or collage it into reality. After it’s done, you may wish to cover it with plastic wrap or wax paper to protect it while you work on the backside. At the very least, make sure you set it down on a clean surface.
Poke or cut out the holes with your craft knife. (I used an awl for the LED and wire holes.)
Now turn the game board over to the back. Cover the bottom portion with heavy-duty aluminum foil and secure it with tape.
Carefully pierce the foil covering the holes and bend the aluminum foil over the edges of the holes.
Assemble the Circuit
In the words of Stephen Covey, begin with the end in mind. Hold off on the actual assembly until you have a solid grasp of how your end product will work and what it will look like.
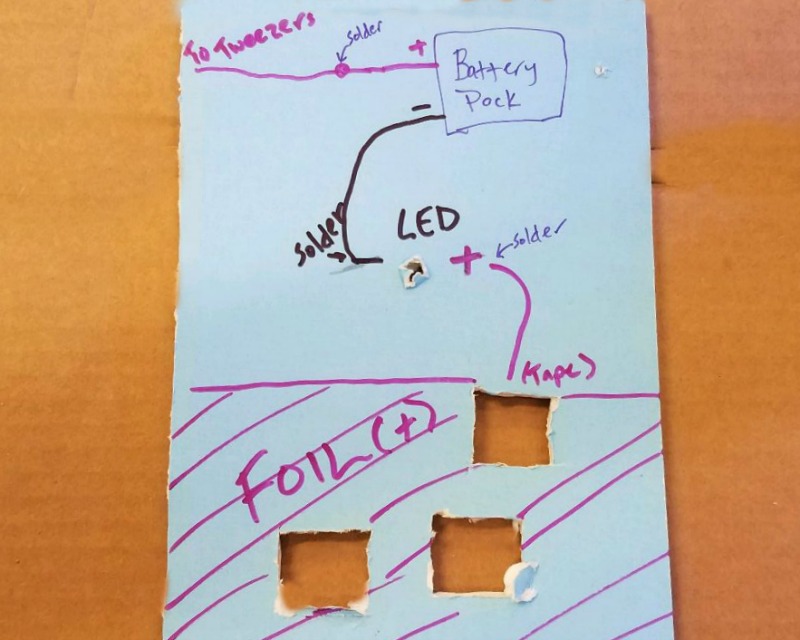
Your game will have three soldered connections:
- Battery positive terminal to positive wire
- Battery negative terminal to the negative left of the LED
- LED positive leg to a red wire
and two taped connections:
- Red wire from the battery to the tweezers (I didn’t want to use solder on an object that is going to be in a child’s hands)
- Red wire from the LED to the aluminum foil
Before you solder, test your connections with the battery pack and ensure your LED works. If it doesn’t work, check that your batteries are loaded properly and that you have respected the LED’s need for polarity.
If everything checks out, go ahead and solder. Here’s a helpful tutorial on soldering two small wires together.
Here’s mine after assembly.

I was excited to play my game after I flipped my board over and placed it in the box, but I found that it didn’t work after all my careful preparation! Engineers and makers often encounter such temporary setbacks.
I took a deep breath and rechecked my batteries and connections. The LED lit up when I tested it. Did it burn out? As I mentally reviewed potential missteps and tested connections I realized that the (literal) disconnect was my tweezers. Though they looked like they’d be capable of conducting electricity, I had not tested them.
I grabbed a magnet to test my tweezers to assess whether they’d conduct electricity. The tweezers were not attracted to the magnet. Alas, that was my sticking (unsticking?) point.
Fortunately, we are a multi-tweezer household. I found another pair and tested it with a magnet. The attraction was immediate. I taped the new set to the red wire and gently touched the aluminum lining one of my mining holes, completing my circuit and activating the light.

Game on!
Finishing Touches
I used glue dots to gently hold the treasures in place in the “mine shafts.” Taking advantages of the functionality of the ST500, I used the micro torch setting to give the game box an aged look.
This post was sponsored by Bernzomatic.